
Quick Tips for Gimp:
10/05/2025 06:43Quick Tips for Gimp:
These tips are for GIMP, but I have been learning from tutorials for PS as well, and have been applying them in GIMP. I found these two programs to be quite interchangeable, which makes sense, because GIMP was made as a free alternative for PS.
While I was re-learning how to make wall recolors, the og tutorials I saw on MTS were making the same step unnecessarily long, which inspired me to write down this list. Mind you, those tutorials were written many years ago, I don't even know if my way was available in GIMP/PS back then.
I use G'MIC-QT and Resynthesizer add-ons. I’ll update this list if I’ll remember anything else.
A general tip for good measurement:
- work over copies. make a backup of the layer before you make any major changes to it. make a backup copy for each significant change, and name it according to the action you've done ["xxx - contrast +0.5" etc.]
- organize the layers in folders/collections, whatever that's called.
This way I can experiment freely without worrying about making changes. It's easier to delete the redundant copies in the end, than trying to retrace the steps you've made in order to reach a certain result.
Dissecting a texture - Get parts of an image:
Get an Image's uhm, Texture/Details:
1. Make it Grayscale:
- Colours -> Hue/Chroma -> Bring Chroma to zero.
- Alternatively, Colours -> Desaturate -> Colour to Grey. Change its definitions... Gives better results but is slower.
- Alternatively 2, run it through Nvidia Texture Tools. Colour options -> Greyscale.
I like this result better than 1.
2. High-pass. Under Filters -> Enhance.
(Basically, make an etch template).
- Optional; play with contrast/ color levels/ other def. first.
Edit: added a part about removing an element from an image, i.e. the Resynthesizer's Heal Selection tool.
Edit 2: added a general tip at the beginning.
 Needs pictures and final checking, but I'm having problems with the game so that's all I can do for now.
How to Make Custom Harvestable/Orchard Trees and Make Them Seasons Friendly.
First thing's first, I am a mere beginner when it comes to editing bhavs. The tips I've added might seem obvious to some, this is just what I mustered on my own. I wrote this tutorial because I hadn't found one when I needed it, and when searching for tutorials, I saw an unanswered ask from recent years on making them.
I relied on Echo's tutorial for Making Trees Season Friendly [MTS], the first steps are repeating her tutorial.
I also recommend reading her tutorial on BHAVS for Beginners since we'll be editing them later on.
Another thank you goes to Simler90 on MTS (https://modthesims.info/showthread.php?t=654471).
Ingredients:
- SimPe.
- Your new tree mesh.
Foliage, bark, and fruits need to be in separate objects/obj groups, and so are any other parts for the different states if you have them; bloom, untrimmed.
- A separate single fruit mesh to become a harvest produce. That will be in a separate package.
- a fake null mesh for states you don't have.
Xxxxxx (I extracted from Aysarth's tree on MTS, you should ask their permission before using for upload, as they dont have a TOU listed).
- Textures for all the various states; seasonal changes for foliage and bark, quality changes to the fruits.
Overview:
1. Cloning an Orchard Tree and getting all the missing resources.
1/2) Missing Seasonabilty resources.
2/2) Missing functionality resources.
2. Editing the resources to match your package.
3. Editing the mesh.
4. Making the fruit package.
( Read more... )
This post will be updated if I'll find anymore interesting things on the subject (well, interesting to me at least).
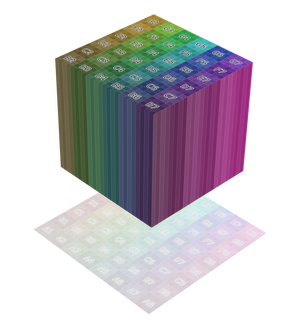
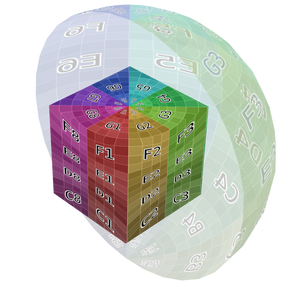
- Back to Geography with this one; I've seen in several places people saying they don't like/understand UV Mapping or unwrapping. Well, I love mapping and had this video by Vox saved. It's short, light, and explains very clearly how projections work, it helped me catch up on the issue. Unwrapping from what I understand, is basically the first part in the video where the guy is fighting the globe. [Edit: UV unwrap equals map projection, is it not?]- This Blender manual has a good demonstration of different projections & their affect on textures, here are just a couple:
Starting this blog with something useful, I hope. [imported from Tumblr, will be updated here].
Sooo this is going to be a long comprehensive list. I got back to this game after a long time and with a different computer, with a dedicated graphics card, hurray! It made me want to return to making things, so while gathering back all the necessary stuff, I’ve complied this list. It might be It is updated as I go along, but these are the main things I use. Maybe one day I’ll even finish something.
So here are my go-to resources & tutorials; I’m posting it here for safekeeping, and hopefully others will find it helpful.
Everything that’s listed is here free.
So many wonderful things for free, under the cut.
( Read more... )